How to get that faded/matte effect in Lightroom
Posted: June 23rd, 2013 | Tags: Photography • Tutorials | Posted in: General, Photography, Tutorials
Note: This tutorial was originally published in 2013. The tips and techniques explained may be outdated.
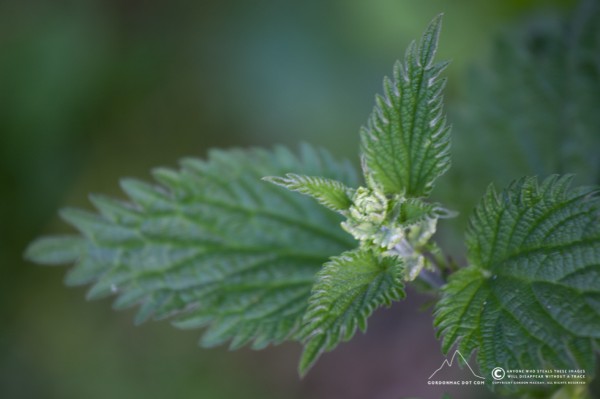
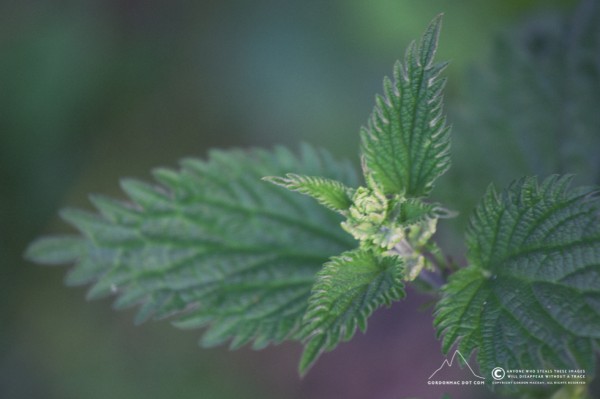
A few people have asked me how I process my photos to have that faded, unsaturated look. There’s nothing much to tell really, it’s a 2 minute process in Adobe Photoshop Lightroom.
Here’s how I go about it:
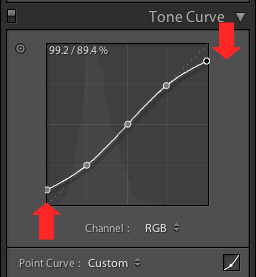
- The fade/matte effect is achieved by simply raising the black levels using the Tone Curve panel:
I set 3 control points for Darks, Lights and Highlights.

I then raise the Shadow level and lower the Highlight level
- Then I use the Split Toning panel to add either green or purple to the shadows and yellow to the highlights.
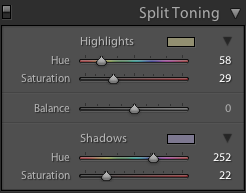
I play around with these a little to get the look I’m wanting – every image is different so different hues and saturation are used all the time. - I add grain. Again, the exact amount and size depends on the image or look I’m trying to make.
- I increase the vibrance and contrast slightly.
- I may increase clarity, but sometimes I may decrease it depending on the image. The same goes for sharpness.


That’s pretty much it :) You can download the free Lightroom Presets of these settings here.
Have fun :D