Processing C-41 negatives – newfound fun!
Posted: September 11th, 2013 | Tags: Photography • Tutorials | Posted in: Photography, TutorialsI’ve wanted to try some film photography for a while, and last month I purchased an old Kodak Retinette 1B camera with a view to processing the photos at home. I got the camera from the charity shop in my street for the princely sum of £20. What a lovely little camera it is, too!
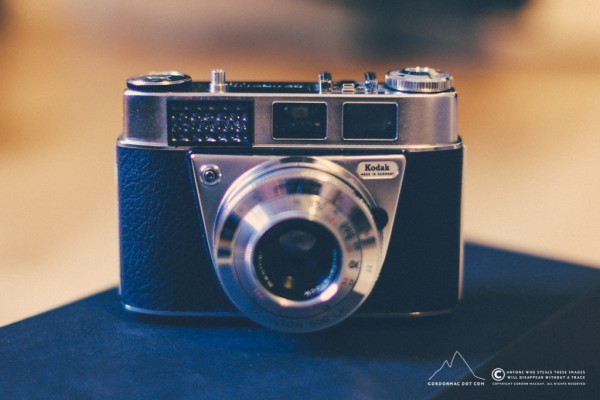
The Retinette range of cameras have been around since the 1930s, but mine, the 1B, was produced sometime around 1959 and boasts the following features:
- Rodenstock Reomar 45mm f/2.8 lens
- Prontor 500 LK shutter (up to 1/500 sec)
- Flash hot shoe
- Manual zone focussing with a depth-of-field scale.
- Manual aperture and shutter speed control
Using it is pretty simple, it’s just like using a DSLR in manual mode. You preset the ISO dial to match the film’s box speed. When you look through the viewfinder there is an exposure meter, you adjust aperture and shutter speed to centre it, or under/over expose as creatively as you like.
Anyway, that’s the camera.
What you need to develop negatives
There are a few things I needed to buy to process the negatives. After some research I went with the following:
- Kaiser Darkroom Changing Bag – Film has to be transferred to the developing tank in complete darkness, making the changing bag, or a room with no light necessary.
- Kaiser Universal Developing Tank – This is a nice big tank, and it’s very easy to load the reels with the film.
- Kaiser Developing Tank Thermometer – An exact and fast thermometer is crucial, as the temperatures of the colour developer solution has to be exactly 38˚C.
- Tetenal Colortec C-41 Negative Kit – This is the most recommended chemistry for the c-41 process. The 1 litre kit I bought will process about 12 rolls of film.
Additional requirements
The other things I needed I managed to buy locally:
- 3 x plastic funnels, one for each chemical solution
- 3 x 1 litre plastic bottles. I purchased some cheap soda water and used the bottles.
- 1 x plastic measuring jug (1 litre)
- A beer bottle opener to open the film canister
- Scissors
- Latex gloves
Obviously you’ll need some sort of scanner with negative scanning ability to convert your negatives to images once you’ve gone through everything on this page.
The developing process I followed
I’m no expert at this, but the following process pretty much worked for me the first time I tried. Some people recommend the 30˚C alternative process detailed in the Tetenal instructions due to colour shifting experienced during the 38˚C process, so I may try that, as I did experience some problems.
- Preheat all the bottles by placing them in a sink containing hot water to heat the contents inside.
- Bring the temperature of the developer up to 38˚C (100 fahrenheit). This is probably the most important part of the process, as getting it wrong can do some weird things to the colour of your photographs. This is why a good thermometer is essential.
- Pour some warm water into your developing tank as a pre soak for around 2 minutes.
- Empty the pre soak and pour in the developer and turn the spool in the tank. Leave it there for 3 minutes and 30 seconds, gently turning the tank upside down a few times every 30 seconds or so.
- Put the developer back in its bottle. Add the Bleach Fixer (blix) for 6 minutes and 30 seconds, turn the spool in the tank, then every 30 seconds gently turn the tank upside down a few times.
- Remove the Bleach Fixer back into its bottle. Run under the tap with warm water for around 3 minutes, emptying the tank now and then and letting it fill up again.
- Add the Stabiliser for 1 minute. Take care with the stabiliser as it has a habit of becoming foamy if you pour it too quickly, I pour it like I would beer into a glass. Turn the spool in the tank, then after about 30 or 40 seconds gently turn the tank upside down a few times.
- Remove the stabiliser back into its bottle and rinse the tank out for 1 minute under warm running water. You’ll need to empty the water a few times.
- Remove the film from the tank, wipe off the excess water and hang to dry for 5 or 6 hours.
- Done.
Digital processing Vs. film processing (done to death, I know)
… but, as much as I love my Canon 5D MKII, this is much more fun than downloading your images from a CF card into Adobe Lightroom! However, it’s a much more time consuming and involved process – also, if you get it wrong you’ve essentially ruined the images.
I wonder if photography would be such a saturated market if this was still the only way to get images from a camera to print, especially when many professional photographers I see posting on Facebook and elsewhere complain about how time consuming their digital workflow is, in spite of the fact that modern digital photography is very fast, and forgiving.
I don’t know how much fun this would be after processing 20 rolls in one sitting though!